
Elementary children have a fascination for natural disasters. They are frightening and intriguing at the same time. When children understand what causes natural disasters, their fear tends to transform into amazement!
The tectonic plates are encountered several times in the Montessori curriculum through geology, functional geography, and history. Children learn that the Earth’s crust is in constant motion. It is comprised of 7 tectonic plates of which boundaries collide or move apart. This phenomenon causes the formation of land and water forms such as mountains, but mostly importantly here, it is responsible for earthquakes.
At Alison’s Montessori, we want children to be able to manipulate materials that introduce scientific processes. Anatomy of a Tectonic Earthquake puzzle is designed to break down the complexity of an earthquake into smaller processable concepts.
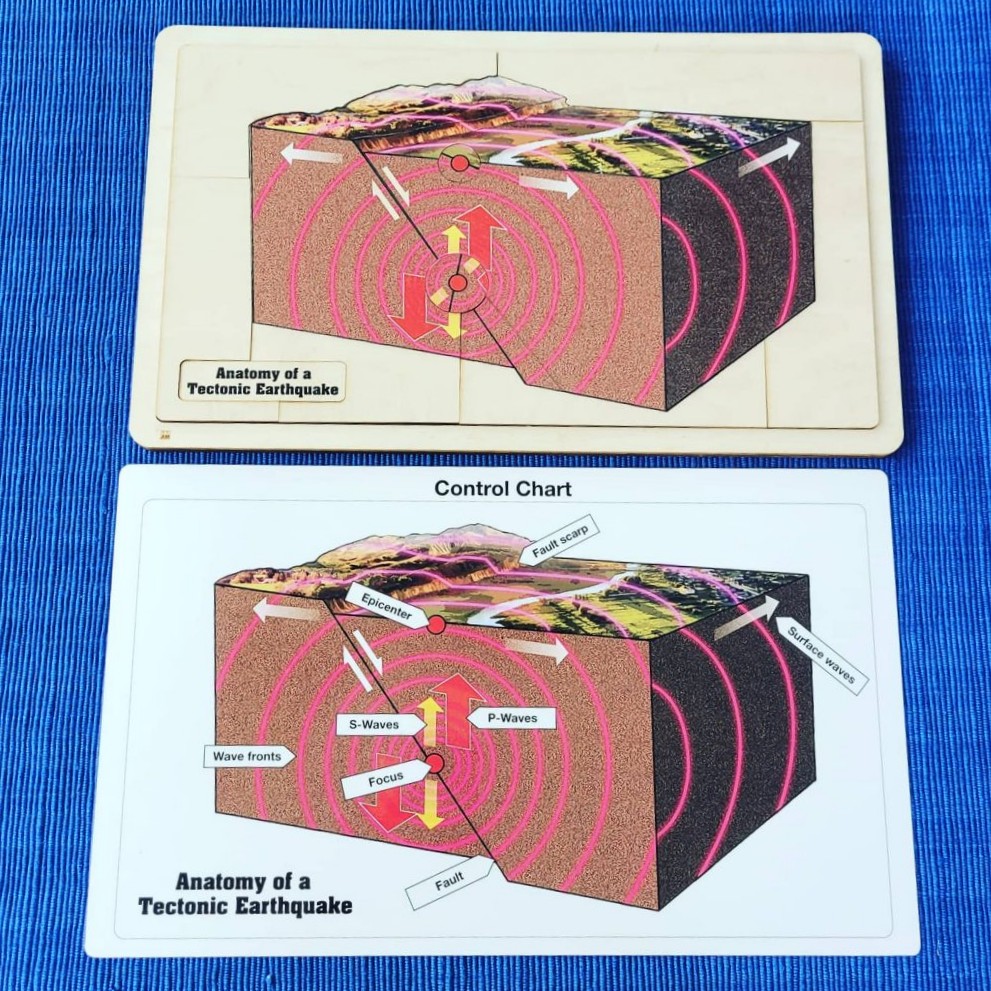
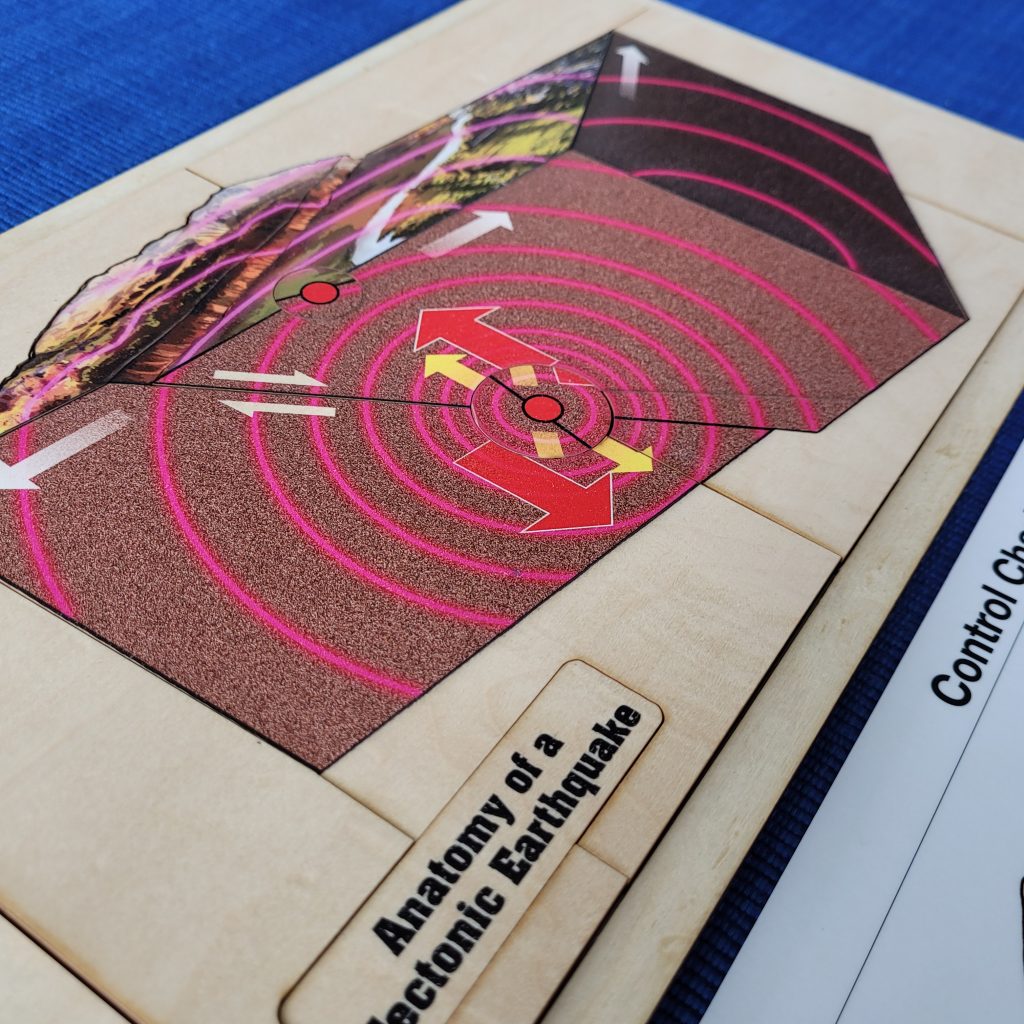
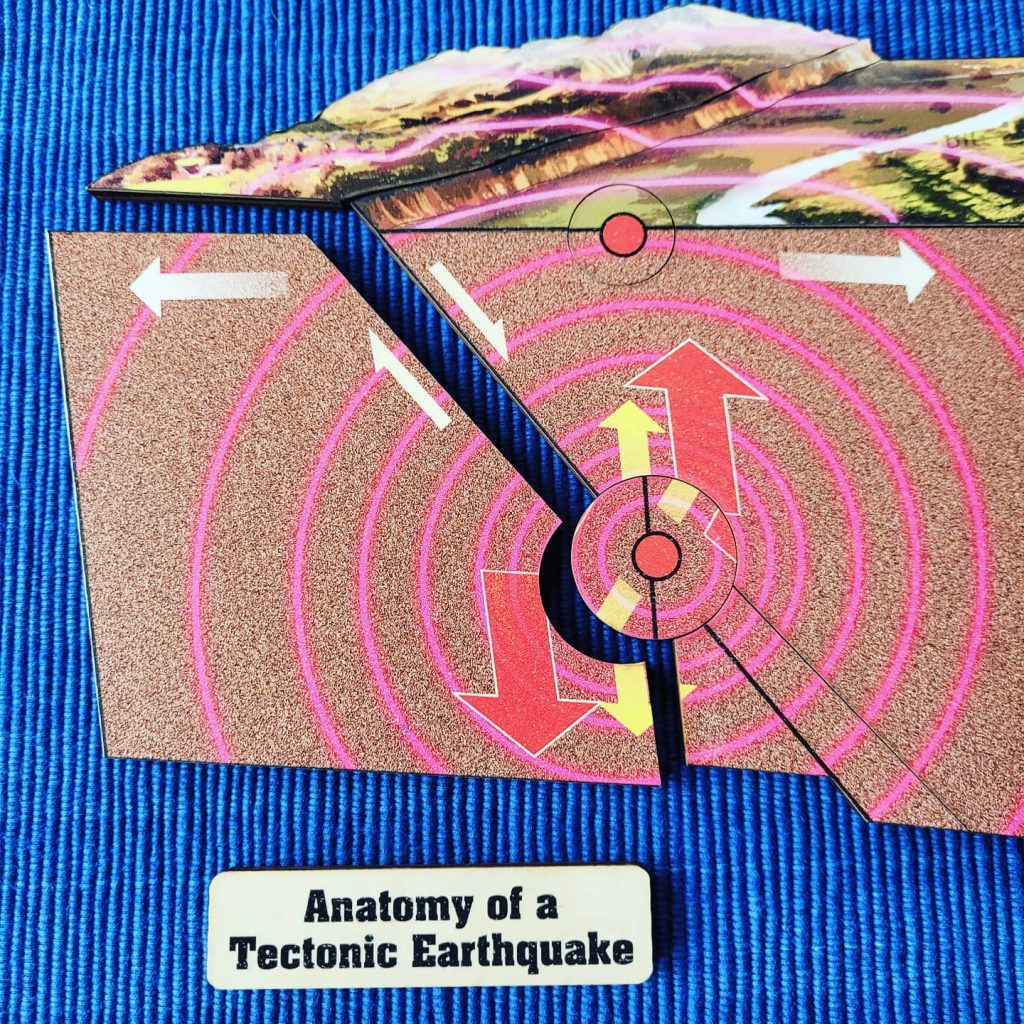
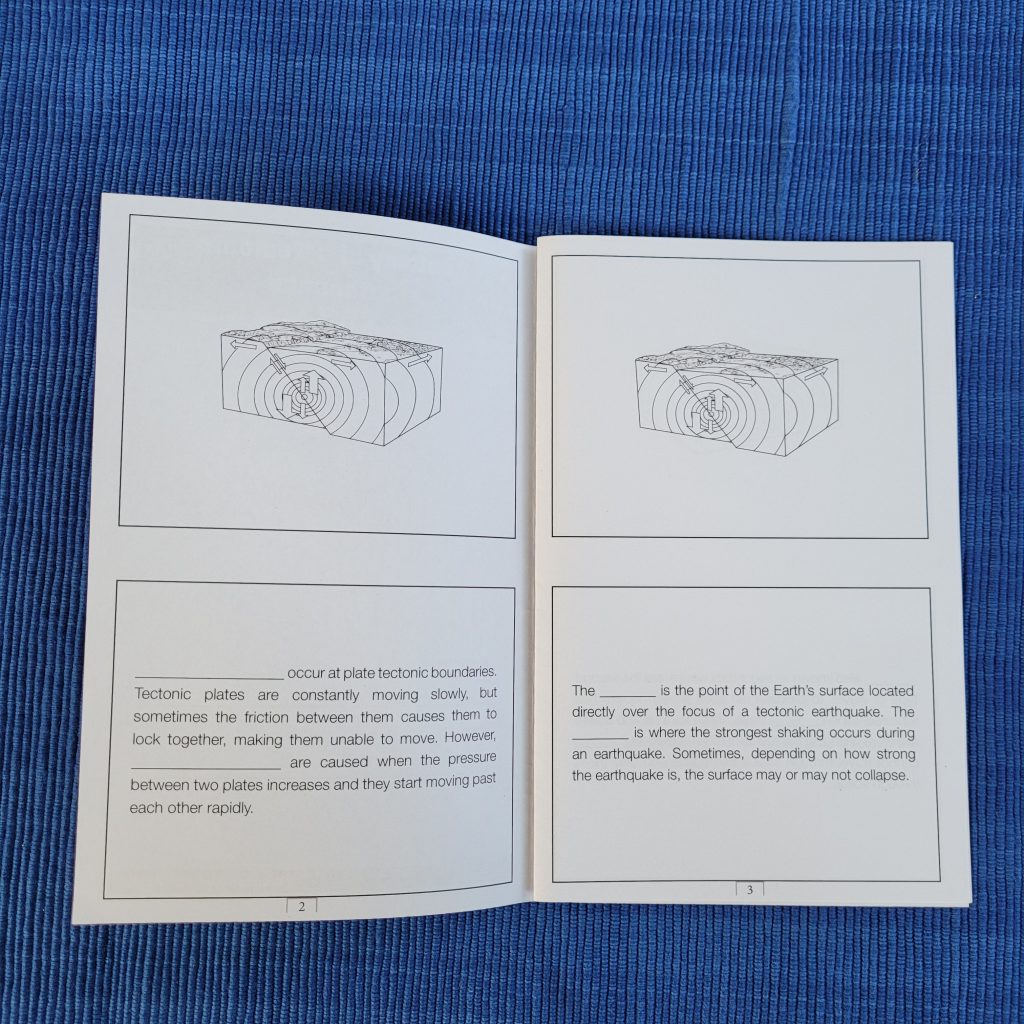
The puzzle includes knowledge about the focus of an earthquake, its epicenter, a fault scarp, surface waves, and different types of other waves.
Materials
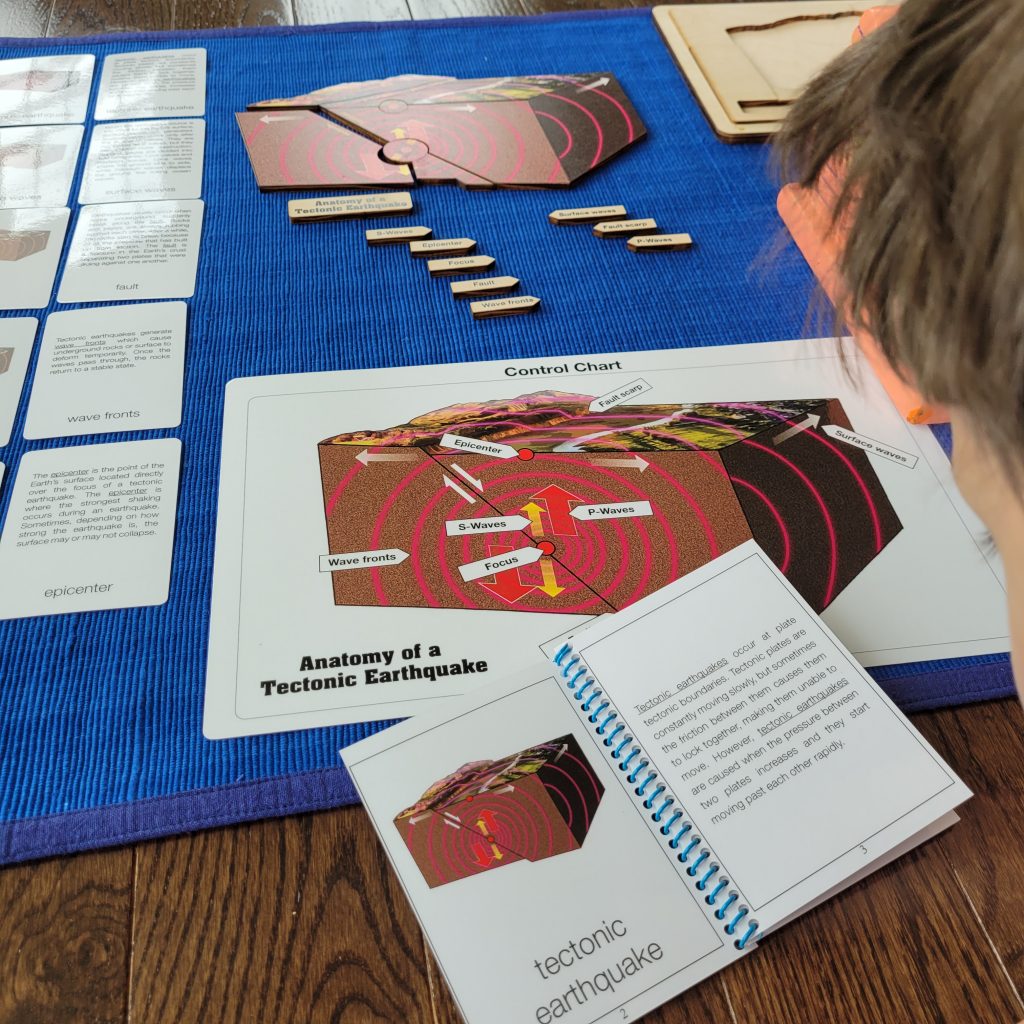
✓ Anatomy of a Tectonic Earthquake wooden puzzle includes a laminated control chart and 8 wooden labels.
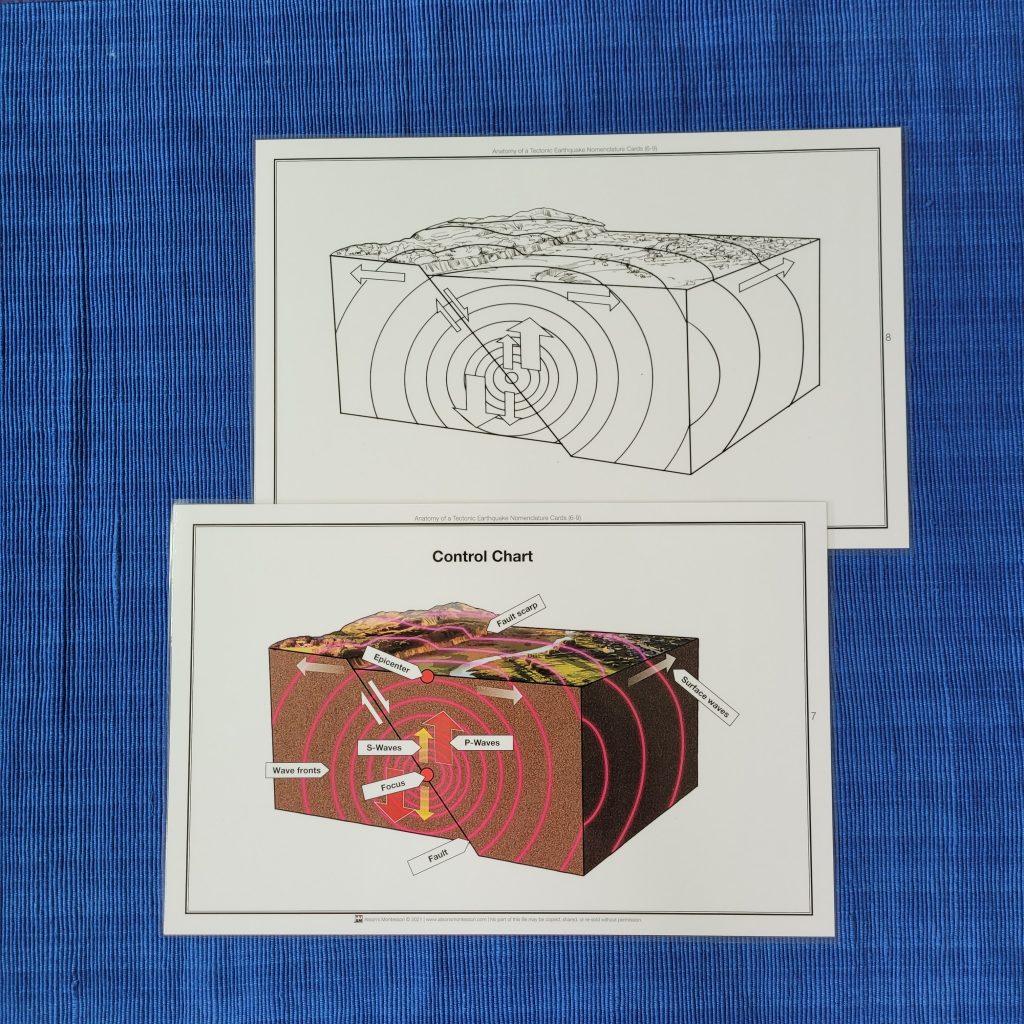
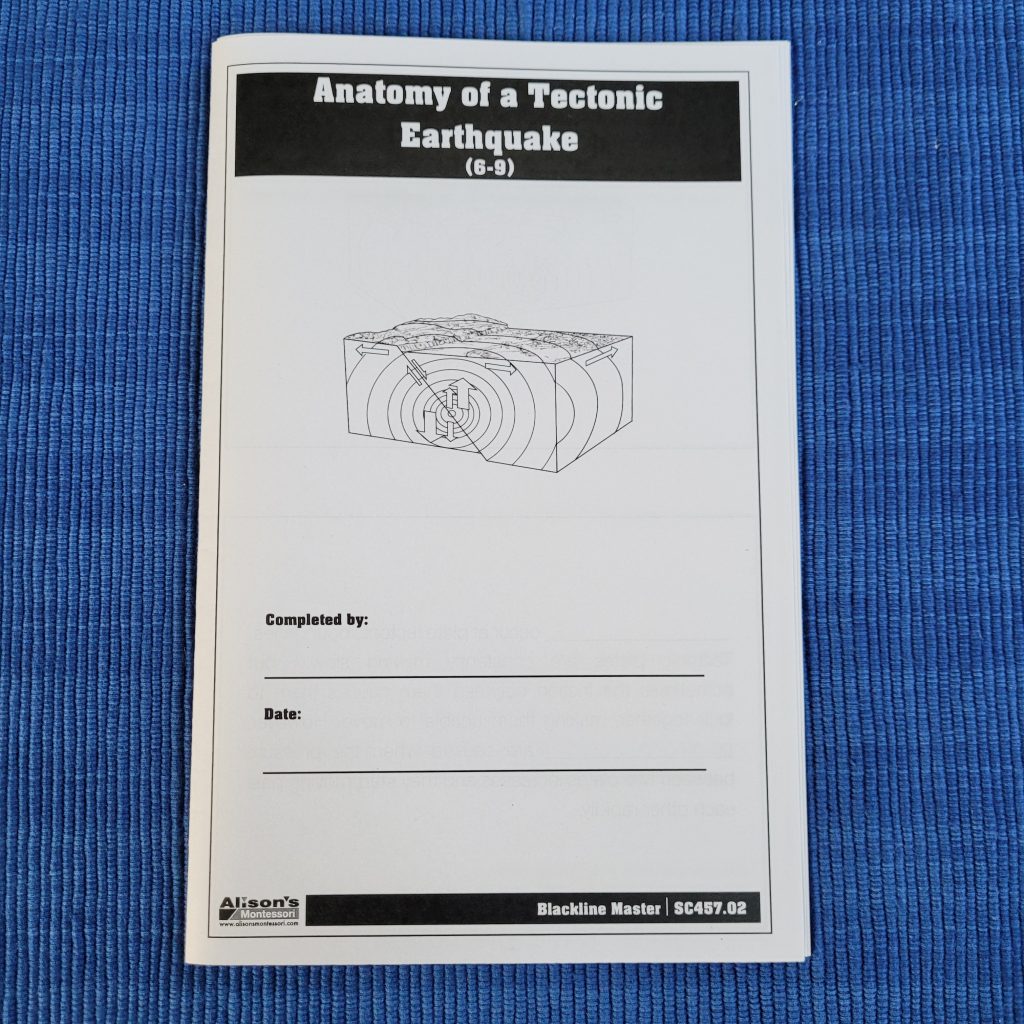
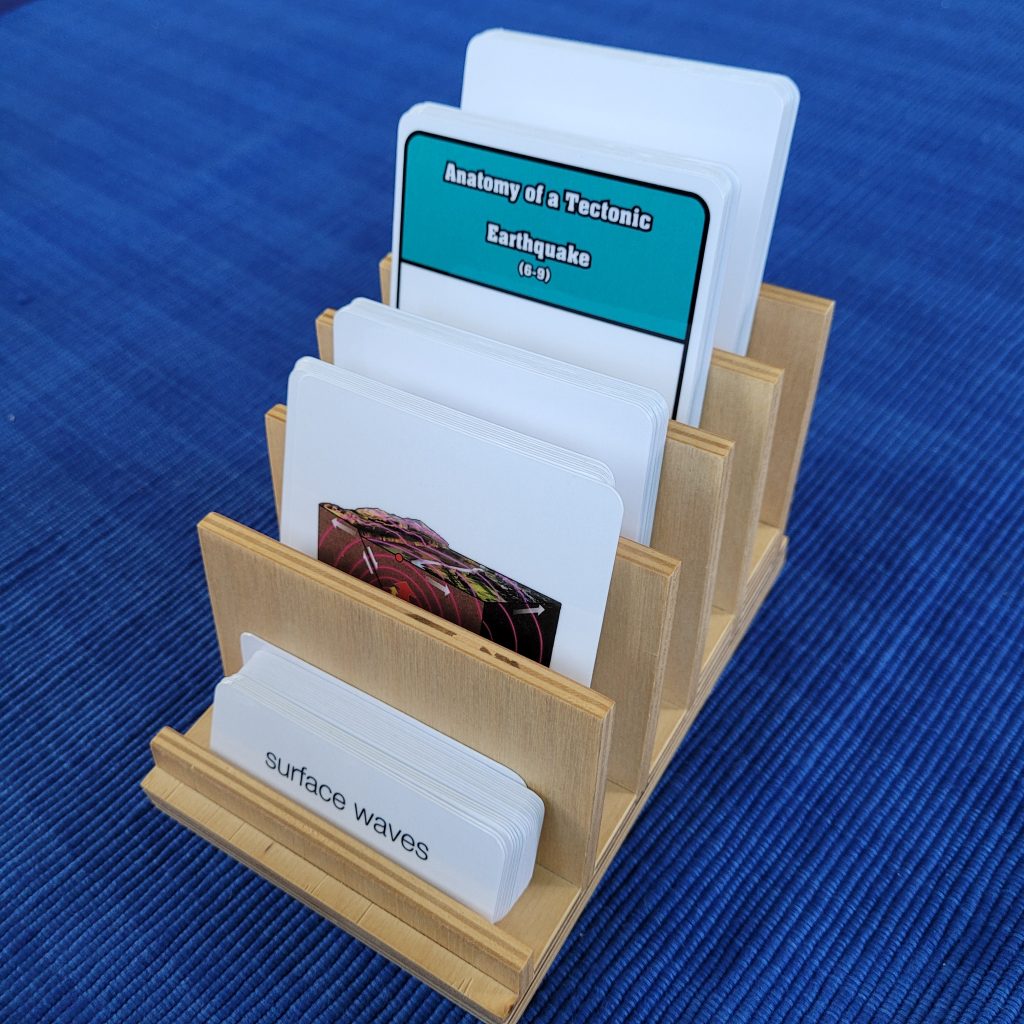
✓ Anatomy of a Tectonic Earthquake nomenclature cards includes 9 sets of five-part cards, a booklet, a reproductible blackline diagram, and a reproductible booklet.
Suggestions on how to use the materials
Prior to using the materials, reading about plate tectonics, and earthquakes would be a helpful introduction to the topic. In addition, to demonstrate how tectonic plates diverge, converge, or transform, you can prepare an impressionistic experiment. Use spray cheese and graham crackers to illustrate the different tectonic plates motions. For a divergent plate boundary, pull the crackers apart to show how new crust forms in the middle. For a convergent plate boundary, show how moutains can form by colliding upwardly 2 crackers. Finally, for a transform plate boundary, slide 2 crackers against one another horizontally. Children will observe the friction, which causes immense pressure when released. This results in shockwaves followed by an earthquake.
Once children are familiar with the topic, you can introduce the Anatomy of a Tectonic Earthquake puzzle. The material is quite versatile! You can choose to introduce the parts of an earthquake by working with the wooden labels. As you place each label, use the Anatomy of a Tectonic Earthquake nomenclature booklet to read the definitions together.
You may also choose to read the nomenclature cards, and organize them on the mat as you read about each part. This way, children see a model of how to organize the cards.
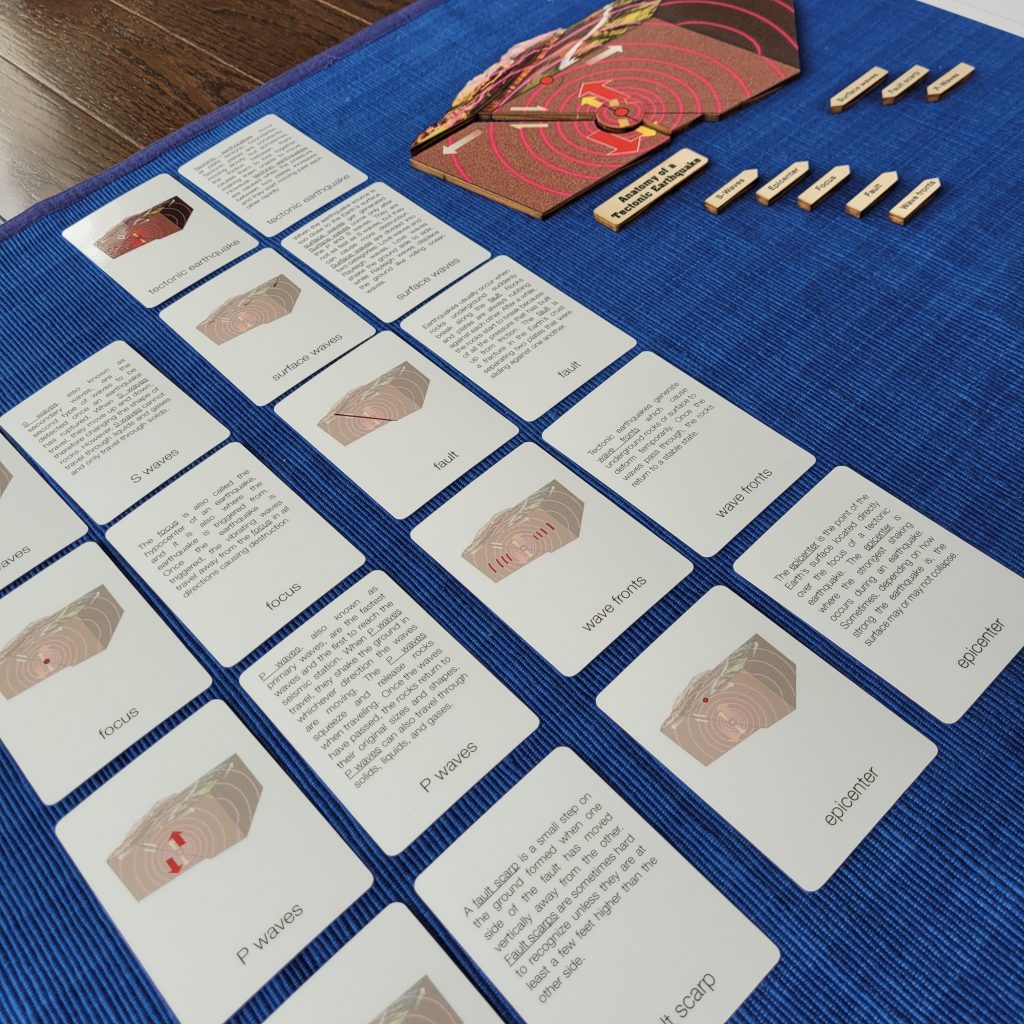
Next, you or the children may choose to deconstruct the puzzle, and name the parts as you build it. You can also spread out the parts of the puzzle on the mat, and use the wooden labels to name each part.
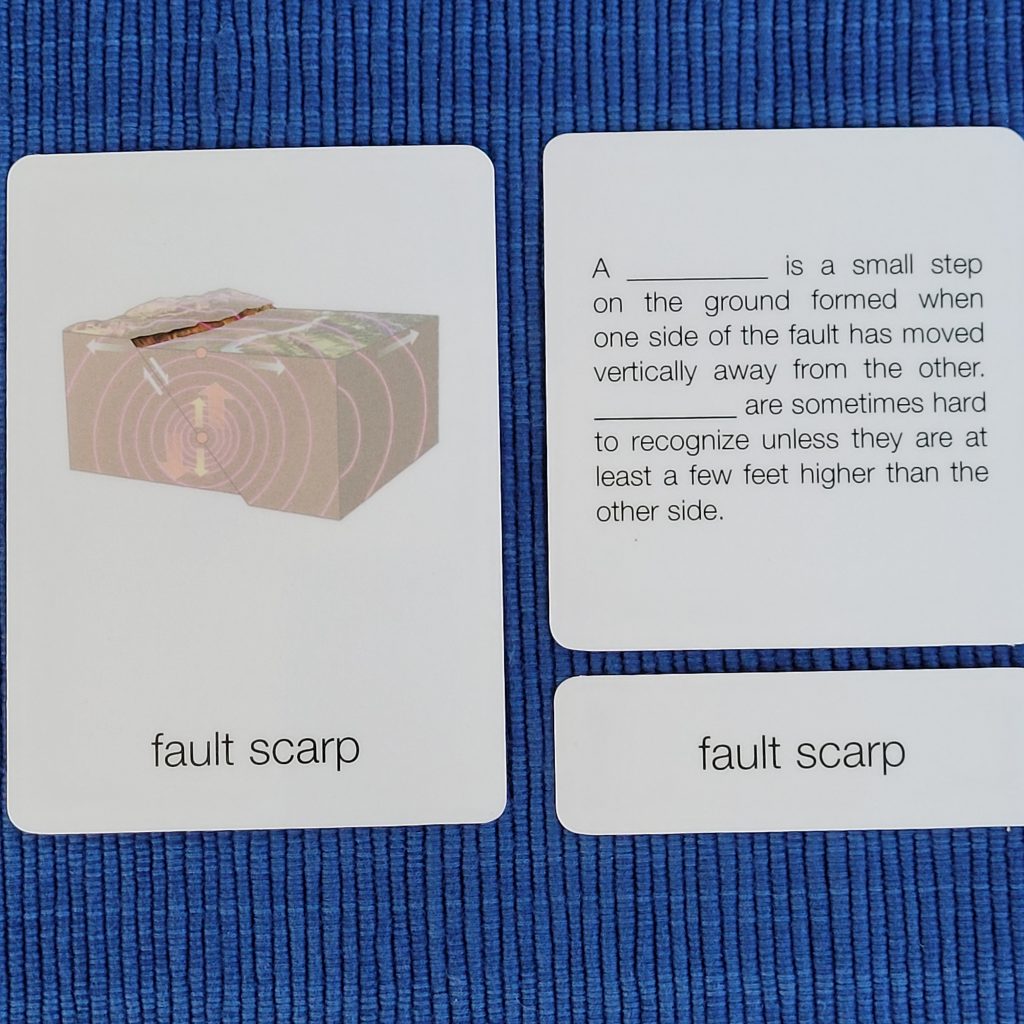
Later, children can decide to work with the nomenclature cards. They will have the choice to match the description cards to the pictures, and labels, or use the cloze test (blanks) cards.
Use the blackline diagram to color and label the different parts of a tectonic earthquake, which comes with the nomenclature cards set.
Another challenging and engaging work is the reproductible booklets. Make copies of the reproductible booklets as needed. Children can use them to assess their knowledge by reading the descriptions and writing the missing word. They can also use the pictures to color and isolate the parts described.
After the presentation, the Anatomy of a Tectonic Earthquake chart can be hung on a wall for a while. Putting a chart on a wall helps children remember the topic, and invites them to repeat the work. Display the puzzle and nomenclature cards on a shelf using our 5-part nomenclature cards tray.
In conclusion, you can help children decide what methods of learning work best for them. A younger learner (3-6) might simply work with the puzzle and/or match the picture cards to the label cards. An old learner might be ready for matching the picture cards to the description cards, and work on the reproductible booklet and blackline diagram. Incorporating impressionistic experiments and literature would be a fantastic compliment to the materials to make it a memorable experience.